Affiliate links on Android Authority may earn us a commission.Learn more.
App development: How to make calls, send SMS, and retrieve the user’s contacts
August 15, 2025
With smartphones getting more advanced all the time, it’s sometimes easy to forget that they’redesignedfor making calls and sending messages, and everything else is just an added extra.
Advanced features likeAugmentedandVirtual Realitymay be grabbing all the headlines, but making calls and sending SMS are some of the most versatile features that you can add to your Android applications. For example, if your app ever displays contact details, such as phone numbers for restaurants, takeaways, tourist attractions, or shops, then there’s a chance that users may actually want tousethis information. By default, the user has to copy the telephone number from your application, switch to their smartphone’s built-in dialer, paste this information into the dialer, and then confirm that they want to make the call. This is a clunky, multi-step process – wouldn’t it be easier if the user could initiate the call, simply by tapping the phone number in your application?

In this article, we’ll be creating an application that lets users initiate calls and send text messages, directly from your application’s UI. This functionality is perfect for numbers that are already displayed in your app, or numbers that the user has memorized, but what about numbers that don’t fall into either of those categories? If you scroll through your smartphone’s phonebook, then chances are there’s very few numbers that you’ve actuallymemorized!
Smartphones have made getting in touch with someone as simple as tapping their name in your phone’s Contacts application, and for the best user experience your app should provide similar functionality.
To make it easy to place calls and send SMS messages toanyphone number, I’ll also be giving our app the ability to retrieve and display the complete list of names and numbers stored in the user’s device.
Making the call
Let’s start by looking at how you’d initiate a call from your application’s UI. While the call is still handled by the phone’s default dialer, the user can place this call simply by tapping a button, and without having to manually navigate any screens in the device’s dialer.
Create a new project using the ‘Empty Activity’ template, and build a simple layout where the user can enter a phone number into an EditText, and then dial that number at the tap of a button:

Getting access to the dialer
There’s two ways that an application can make a phone call:
I’m going to use the ACTION_CALL intent, so you’ll need to add the following to your Manifest:
An app can only place calls and send SMS messages if the “telephony” hardware is present on the device. Whenever your app has features that rely on certain hardware or software, you need to consider the kind of experience your app would provide on a device that’s missing this hardware or software. Our app is just an EditText field and a ‘Call’ button, so it has nothing to offer a device that doesn’t feature telephony hardware, such as a tablet.
It’s always better to prevent your app from being installed on a device where it would provide a poor user experience, rather than risk someone downloading your app to an incompatible device, having a bad experience, and then leaving you a negative review on Google Play as a result.
If your app can’t provide a good user experience without telephony hardware, then you should mark this hardware as a requirement, by adding a declaration to your Manifest, and setting it to “true.”
You should also declare any hardware and software that your appdoesn’trely on, but will use where available. For example, if our app still had plenty to offer on devices thatcan’tmake calls or send SMS messagess, then you’d use the following instead:
When you upload your app, Google Play checks your app’s permissions for any implicit hardware or software related features that youhaven’tdeclared in your Manifest. If it discovers any, then it’ll assume your appdoesrequire this hardware or software, and will prevent your app from being installed on devices that don’t meet these requirements.
To ensure this behavior doesn’t prevent your app from being installed on devices that it’s perfectly compatible with, you should get into the habit of declaringeveryhardware and software feature that your app uses, and then tag them as “true” or “false,” as appropriate.
Create an ACTION_CALL intent
In our project’s MainActivity, we need to perform the following:
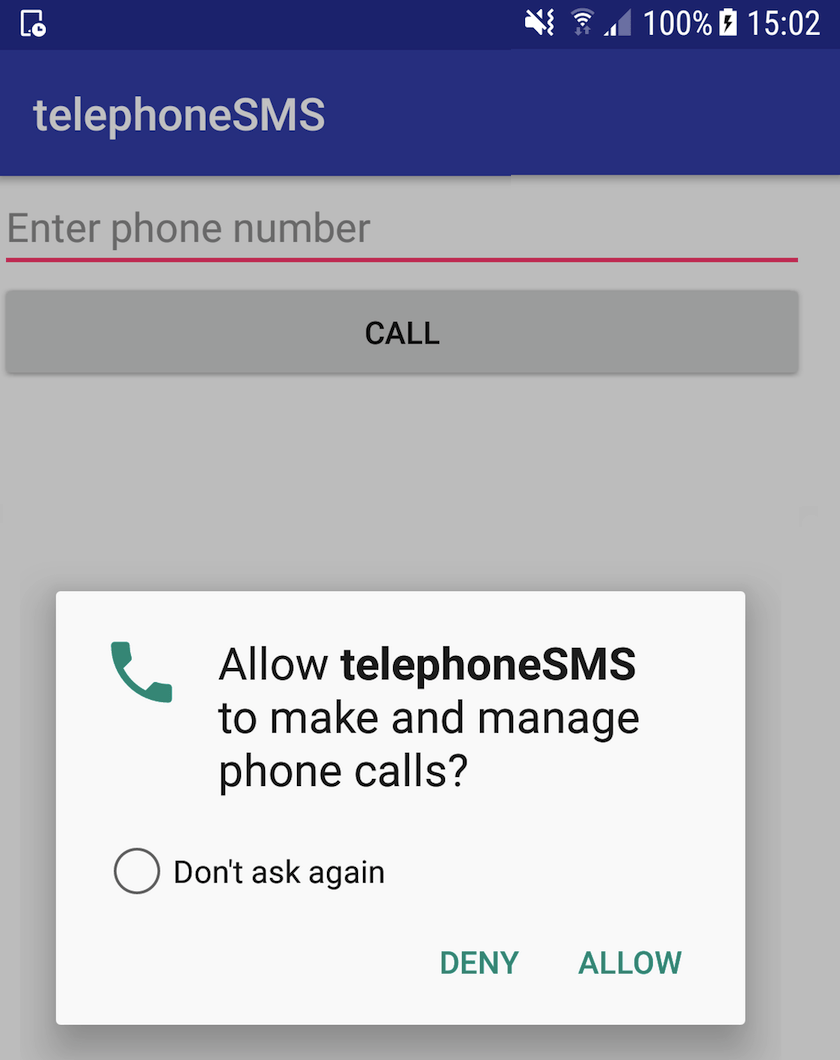
Install this application on a physical smartphone or tablet, or an Android Virtual Device (AVD). As soon as the app launches, it should request permission to make calls. If you grant this permission request, then you’ll be able to initiate calls by entering any valid telephone number into the EditText, and then tapping ‘Call.’
If you deny the permission request, then the button will be disabled.
Retrieving the contacts list
At this point, our application has one major drawback: the user needs to have memorized the number they want to dial. This isn’t always going to be the case, so let’s give our app the ability to retrieve and displayallthe phone numbers the user has stored on their device.
Firstly, reading the user’s contact data requires our app to have the READ_CONTACTS permission, so let’s add this to our Manifest:
I’m going to display this information as a scrollable list that the user can access by tapping a ‘Load Contacts’ button. Open the main_activity.xml file and add this button, plus a ListView that’ll eventually display all the contacts information:
Next, we need to create an XML layout that defines the structure for each line in our ListView. This layout can be elaborate, but I’m keeping things simple by including a single TextView and specifying the text size:
In our MainActivity, we need to perform the following:
Android provides a ContactsContracts class, which defines a database of contact-related information, stored in a ContactsContract.Data table. We’ll use ContactsContracts to access the Contacts Provider without having to define our own constants.
Install this project on your Android device. Now, when the app launches it’ll request permission to access your contactsandmake calls. If you grant these permissions, then you’ll be able to view all your contacts, by giving the app’s ‘Load Contacts’ button a tap.
If you deny these permission requests, then the ‘Call’ and ‘Load Contacts’ buttons will be disabled.
Sending text messages
In this final section, I’ll show you how to send SMS messages directly from your app, using Android’s SmsManager class.
I’m going to implement this functionality in a separate SMSActivity, so let’s start by creating a new layout resource file:
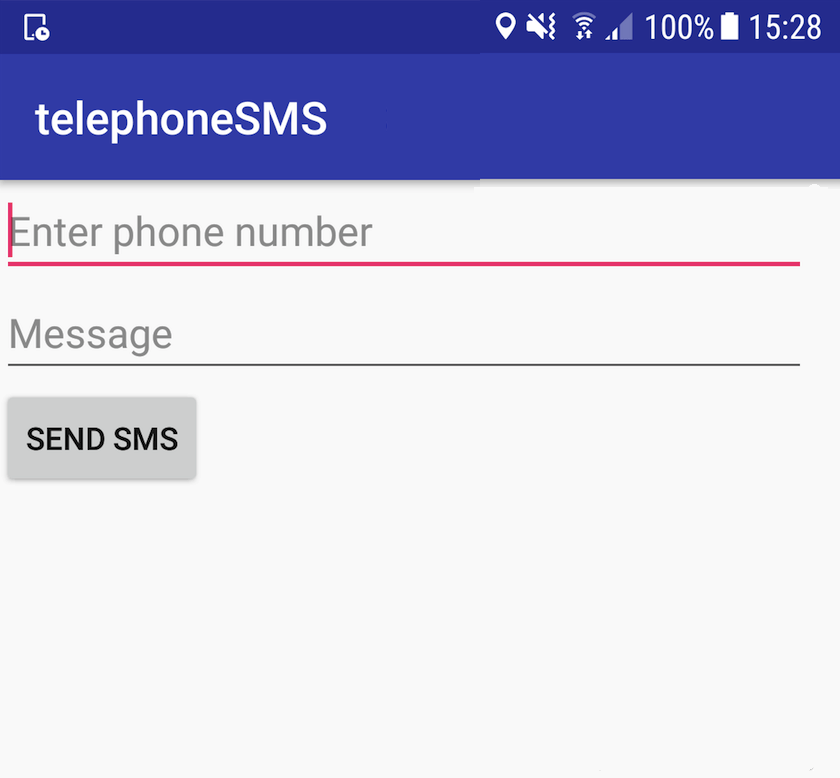
This is a simple UI where the user can send SMS messages by entering any valid mobile number, some message text, and then giving the ‘Send SMS’ button a tap.
Our ‘activity_sms.xml’ needs a corresponding Java class, so select ‘File > New > Java class’ from the Android Studio toolbar, and name this class ‘SMSActivity.’
Thanks to the SmsManager, the process of sending the message is fairly straightforward: you simply need to use getDefault() to retrieve the SmsManager, and then pass the phone number and the message to the sendTextMessage method.
We also need to check whether our app currently has access to the SEND_SMS permission and then request it, if necessary. Once again, if the user denies the permission request, then we should disable all related functionality, which in this instance means disabling the ‘Send SMS’ button.
Next, open your project’s Manifest and add the SEND_SMS permission. We also need to declare the SMSActivity component:
The last task is ensuring the user can reach SMSActivity from the app’s MainActivity. Open your project’s activity_main.xml file and add a ‘launchSMS’ button:
Finally, implement the onClick in MainActivity:
Take this project for a spin by installing it on your Android device. As soon as you navigate to SMSActivity, the app should request permission to view and send text messages. If you grant this permission request then you’ll be able to send SMS messagesdirectlyfrom the application’s UI.
In addition, you’re able to monitor the status of sent messages using the following parameters:
For example:
You candownload this complete project from GitHub.
Wrapping up
In this article, we looked at how to initiate calls and send SMS messages directly from your application’s UI, and how to retrieve the complete list of contacts stored on the user’s device.
While they’re easy to overlook in favour of some of Android’s newer, more cutting-edge functionality, sending SMS and making calls are some of the most versatile features you may add to your Android apps. And, unlike newer features, you can be confident that pretty much every Android smartphone has full support for making calls and sending messages!
What are some of the “go-to” features that you regularly add to your Android apps? Let us know in the comments below!
Thank you for being part of our community. Read ourComment Policybefore posting.
