Affiliate links on Android Authority may earn us a commission.Learn more.
How to use recycler views
July 21, 2025
The recycler view is one of the most versatile and useful views in Android development. It can essentially form the backbone of an entire UI. Recycler view is similar to a list, but rather than simply displaying images and text in a straight line, it can store entire multimedia layouts. Defining the layout for each row once will make you able to reuse it over and over, and display different information.
Whether you want to create an image gallery, a news app, or a messenger, a recycler view is often the best tool for the job.

Unfortunately, all this extra power also means recycler view is slightly more complicated than other views, which can often be simply dragged and dropped in the design view. Roll up your sleeves and let’s dig in.
Difficulty Level:Some familiarity with using classes is recommended.
Adding a recycler view and a layout
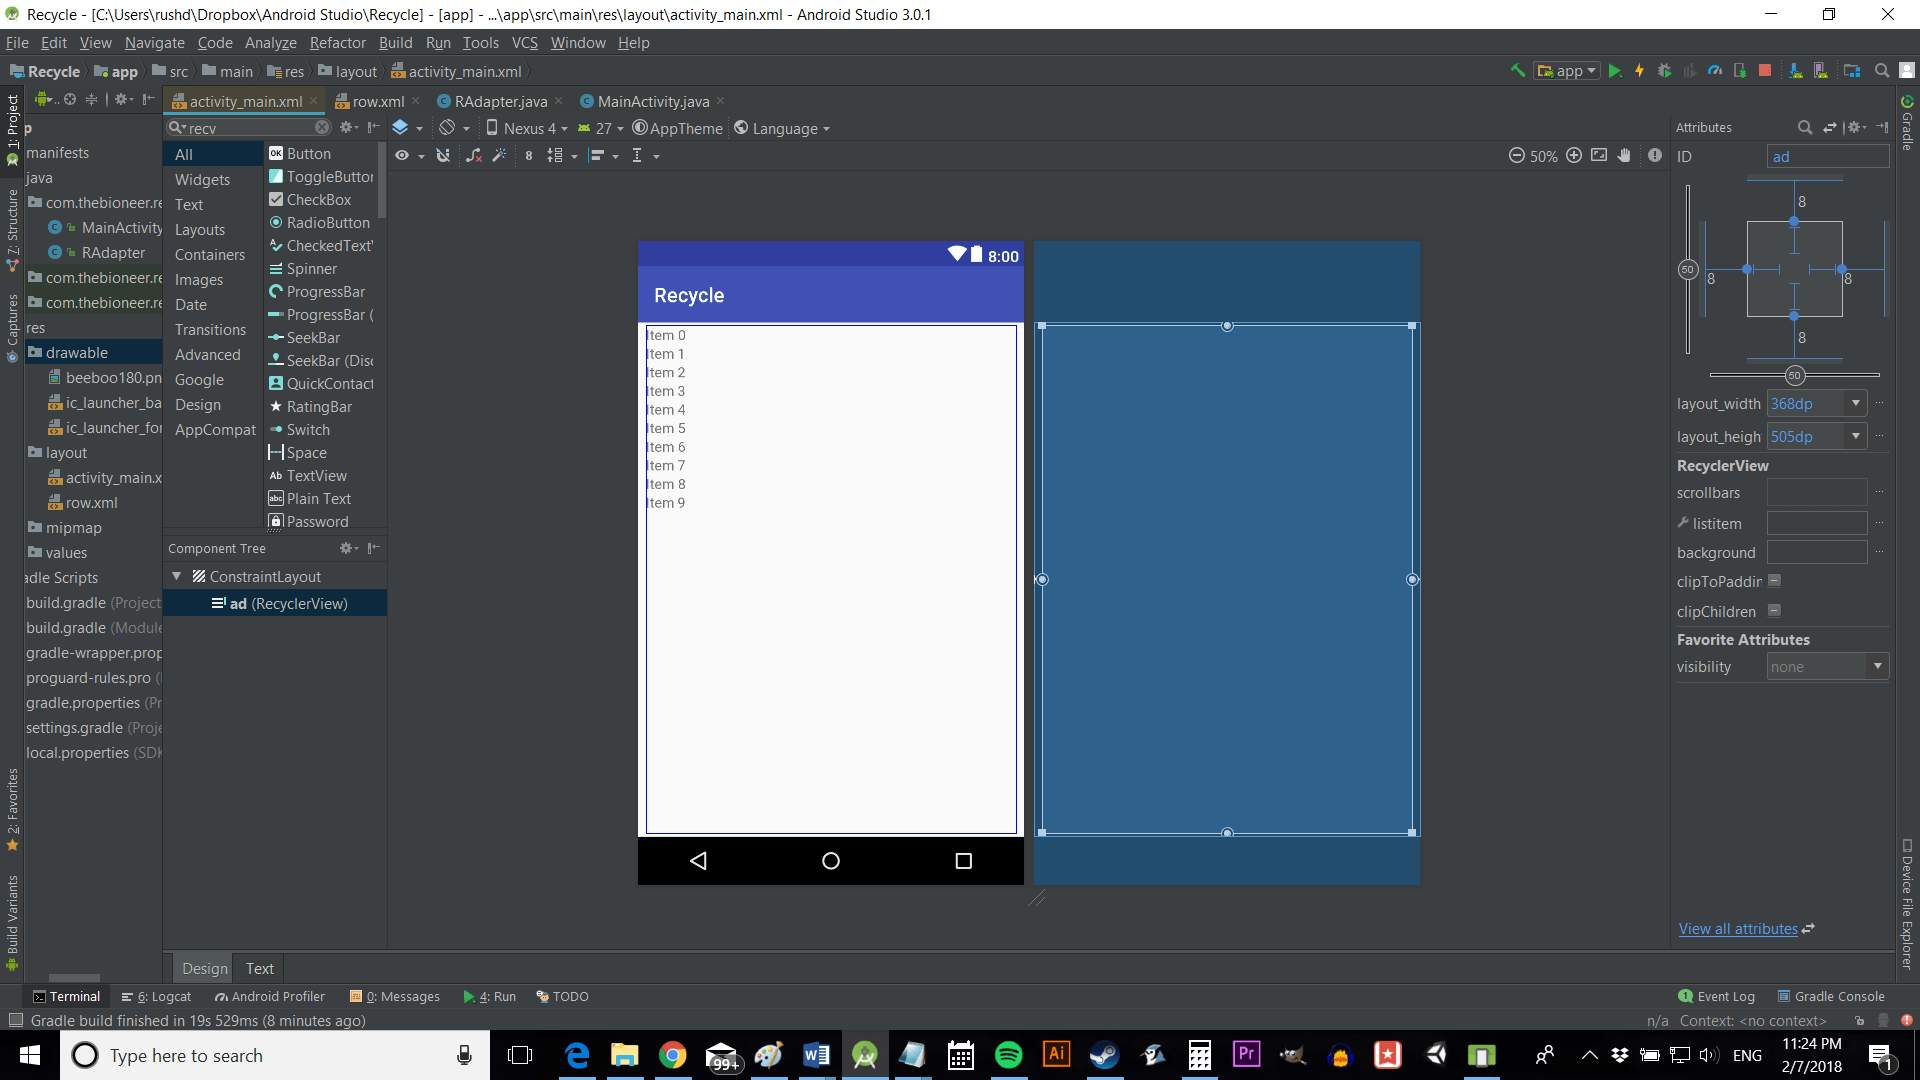
Create a new project with an empty activity. Open up youractivity_main.xmllayout file and add the recycler view. This will just show a list of blank items for now. If you have problems with it, then you may need to check thebuild.gradlescript — though it seems to work okay these days without any need to fiddle around in there. I gave my recycler view the IDRView.
Now create a new XML layout file. This is going to define the layout of each row in your list, whether it’s be populated by images, text, video, or a combination of all those things.
Call your XML filerow.xmland then make sure that the height is set towrap_contentor a pleasing height in dp. That will prevent it from spilling over the height of the row and will make sure everything else fits nicely.
You can choose whatever you like to show here. It could be a text view, an image view, a button, a combination of those things, or whatever else.
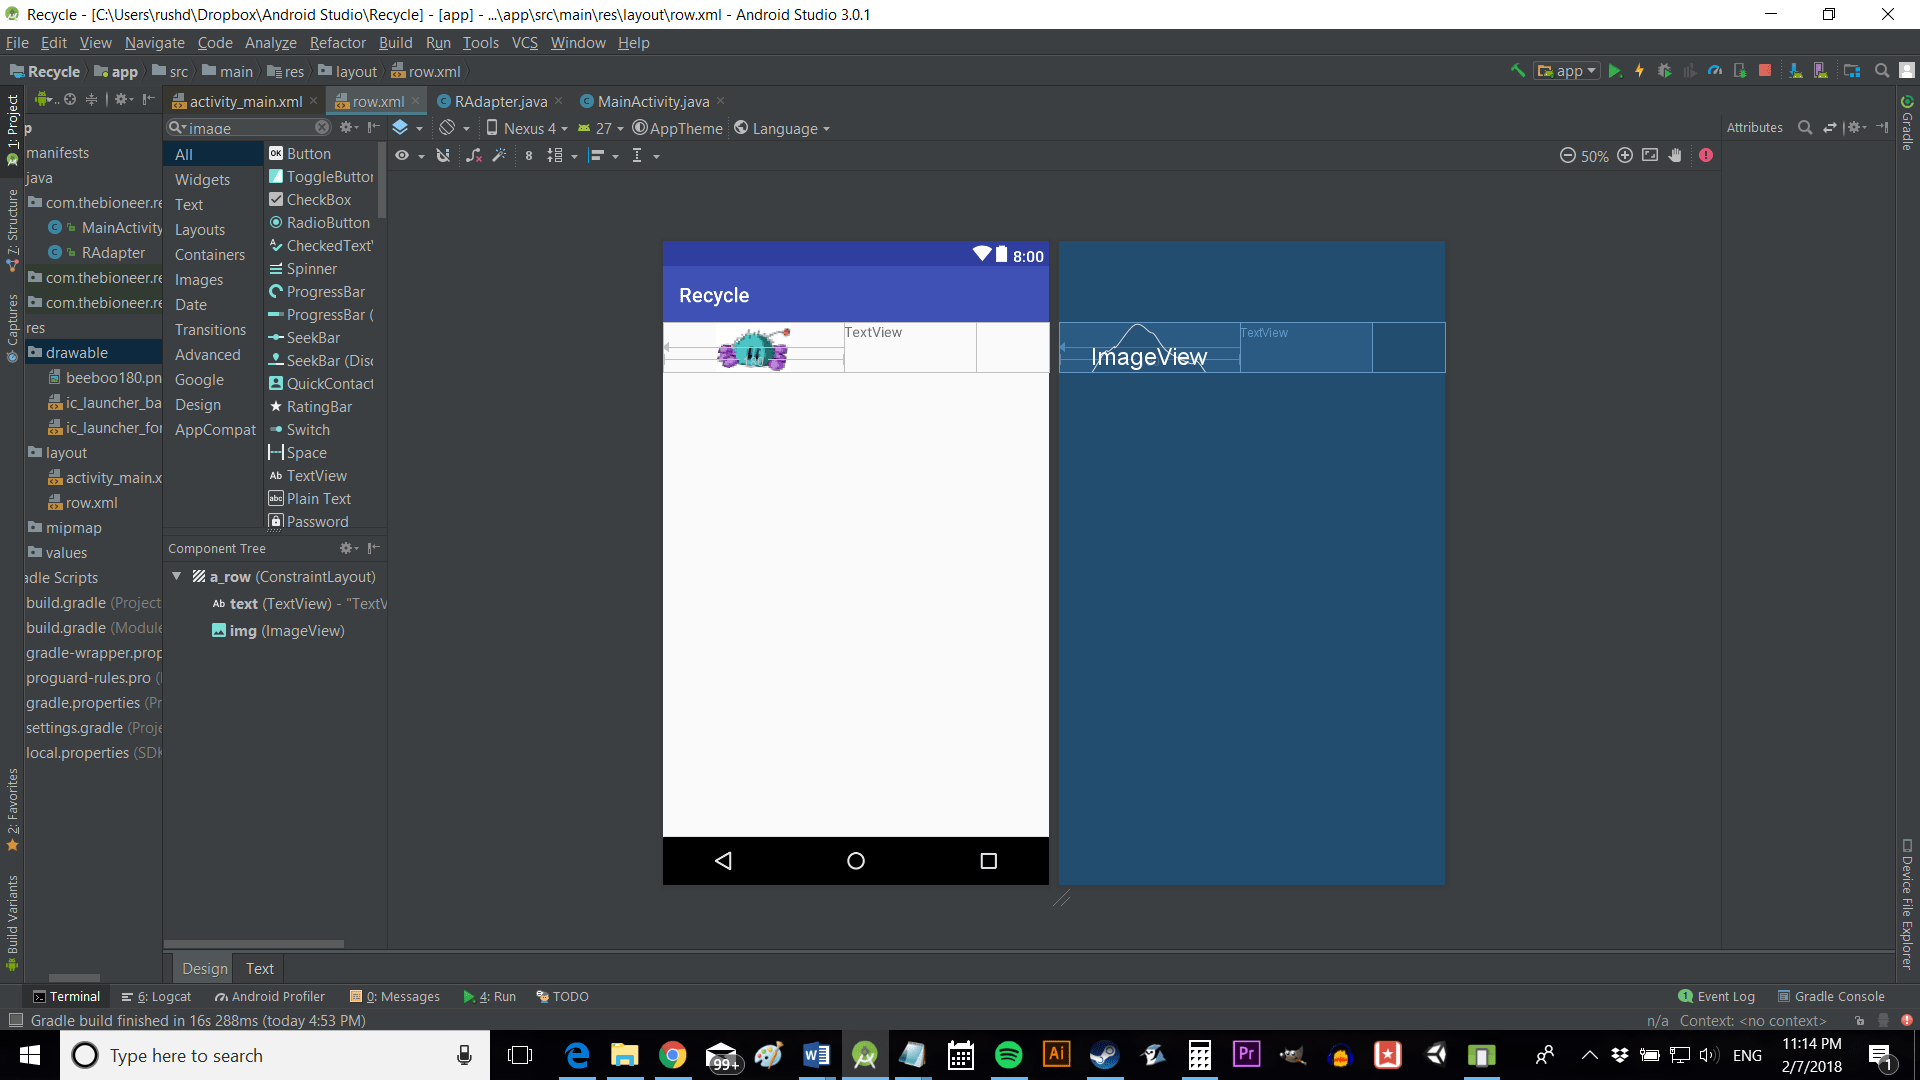
We’re making a mock messaging app, so each entry in our list will contain an image and some text. That would normally be the image of the contact along with the message they sent.
Add whatever image you have to hand to thedrawablefolder and then add an image view and a text view. Add IDs to those views (.textand .imgrespectively if you’d like to follow along) and call the constraint layout itselfa_row.
This is the layout which will be used over and over to show each item on our list. It can be as simple or complex as you like.
Working with adapters
To use the recycler view, you will need a view holder and an adapter. Adapters are used to link UI elements with code, while view holders contain views. This is the complicated bit and it can be a little bit of a headache to set up, but once you have it working, you can simply recycle the framework each time you’d like to use recycler views in your apps. Fair warning: this comes with a quite advanced difficulty rating and it will all make a lot more sense if you have some familiarity with Android development.
Now it’s time to build an adapter for our recycler view, which will use a view holder in order to “hold” the layouts we’ve created. The adapter will bind the code and the view holder together and show them on the screen.
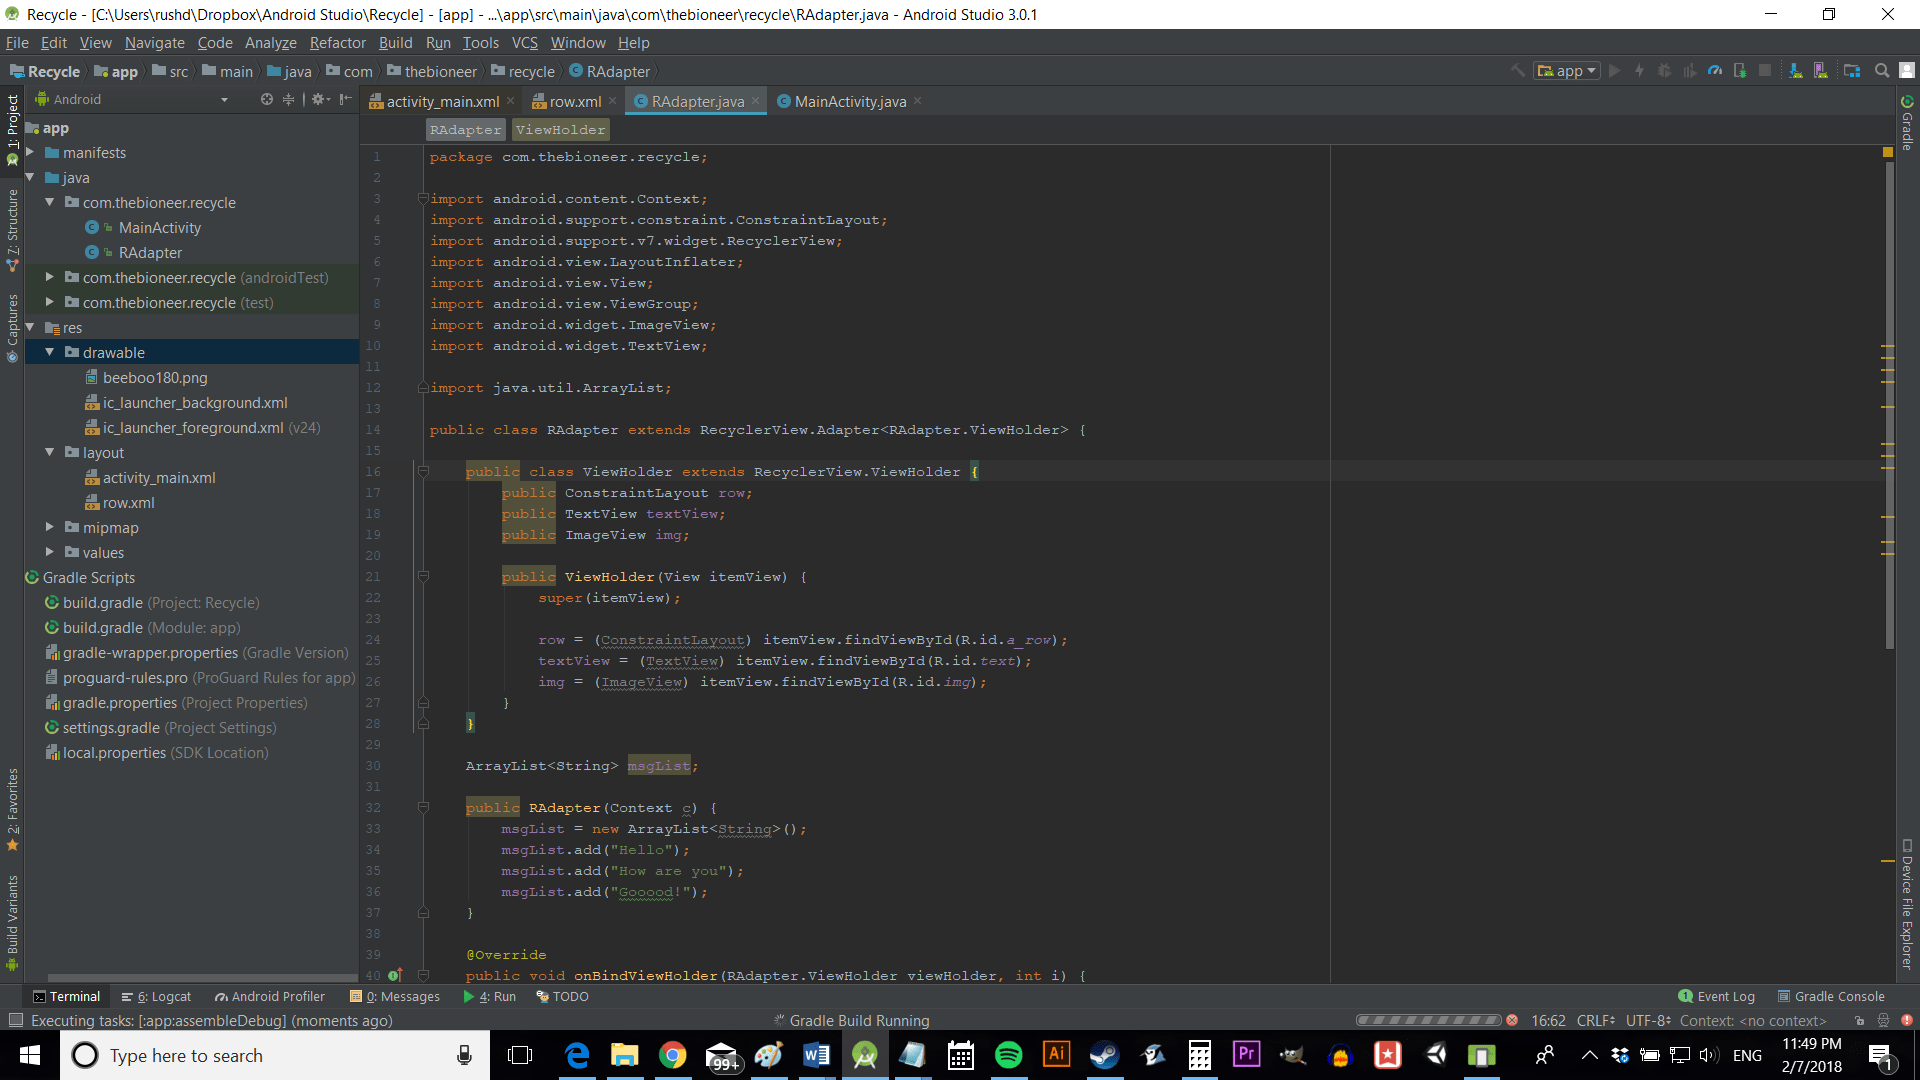
To do this, we need to create new class, which is going to extendRecyclerView.Adapter. Call itRAdapterand write it like this:
This means it will inherit from the adapter class, so we can use methods from that superclass to create our own custom adapter to show information the way we want. Our class is behaving like an adapter now.
Next, you’re going to create your view holder. This will be a subclass within yourRAdapterclass and will extendRecyclerView.ViewHolderso it can act like a view holder. Put it up the top before the constructor.
What we’re doing here is locating the row and the views within it — our text view and image view. This will allow us to use the adapter later to change the content.
Back in the mainRAdapterclass now, we’ll need to override some methods. I’m also using this opportunity to add a list of messages (calledmsgList) which we will build in the constructor.
Place all this below theViewHoldersubclass:
Some of these methods likegetItemCount()just need to be overridden. This one simply allows the system to see how many items are in our list, so we’re returning the size of ourmsgList.
onCreateViewHolderis where theviewholderis created using the class we just built. The interesting part is inonBindViewHolder. Here, we are finding the text view in our view holder and adding the content from the msgList for each new row. This is where the adapter does its adapting.
I’ve left the image as it is, but you can see how to change that in here — perhaps using a map with sender information pointing to the right icon for each contact. Likewise, you could have fed this list in from elsewhere to make this class more versatile. This is a simple way to demonstrate how everything works, so you can bend it to your will!
Here’s how the whole thing should look:
Finishing touches
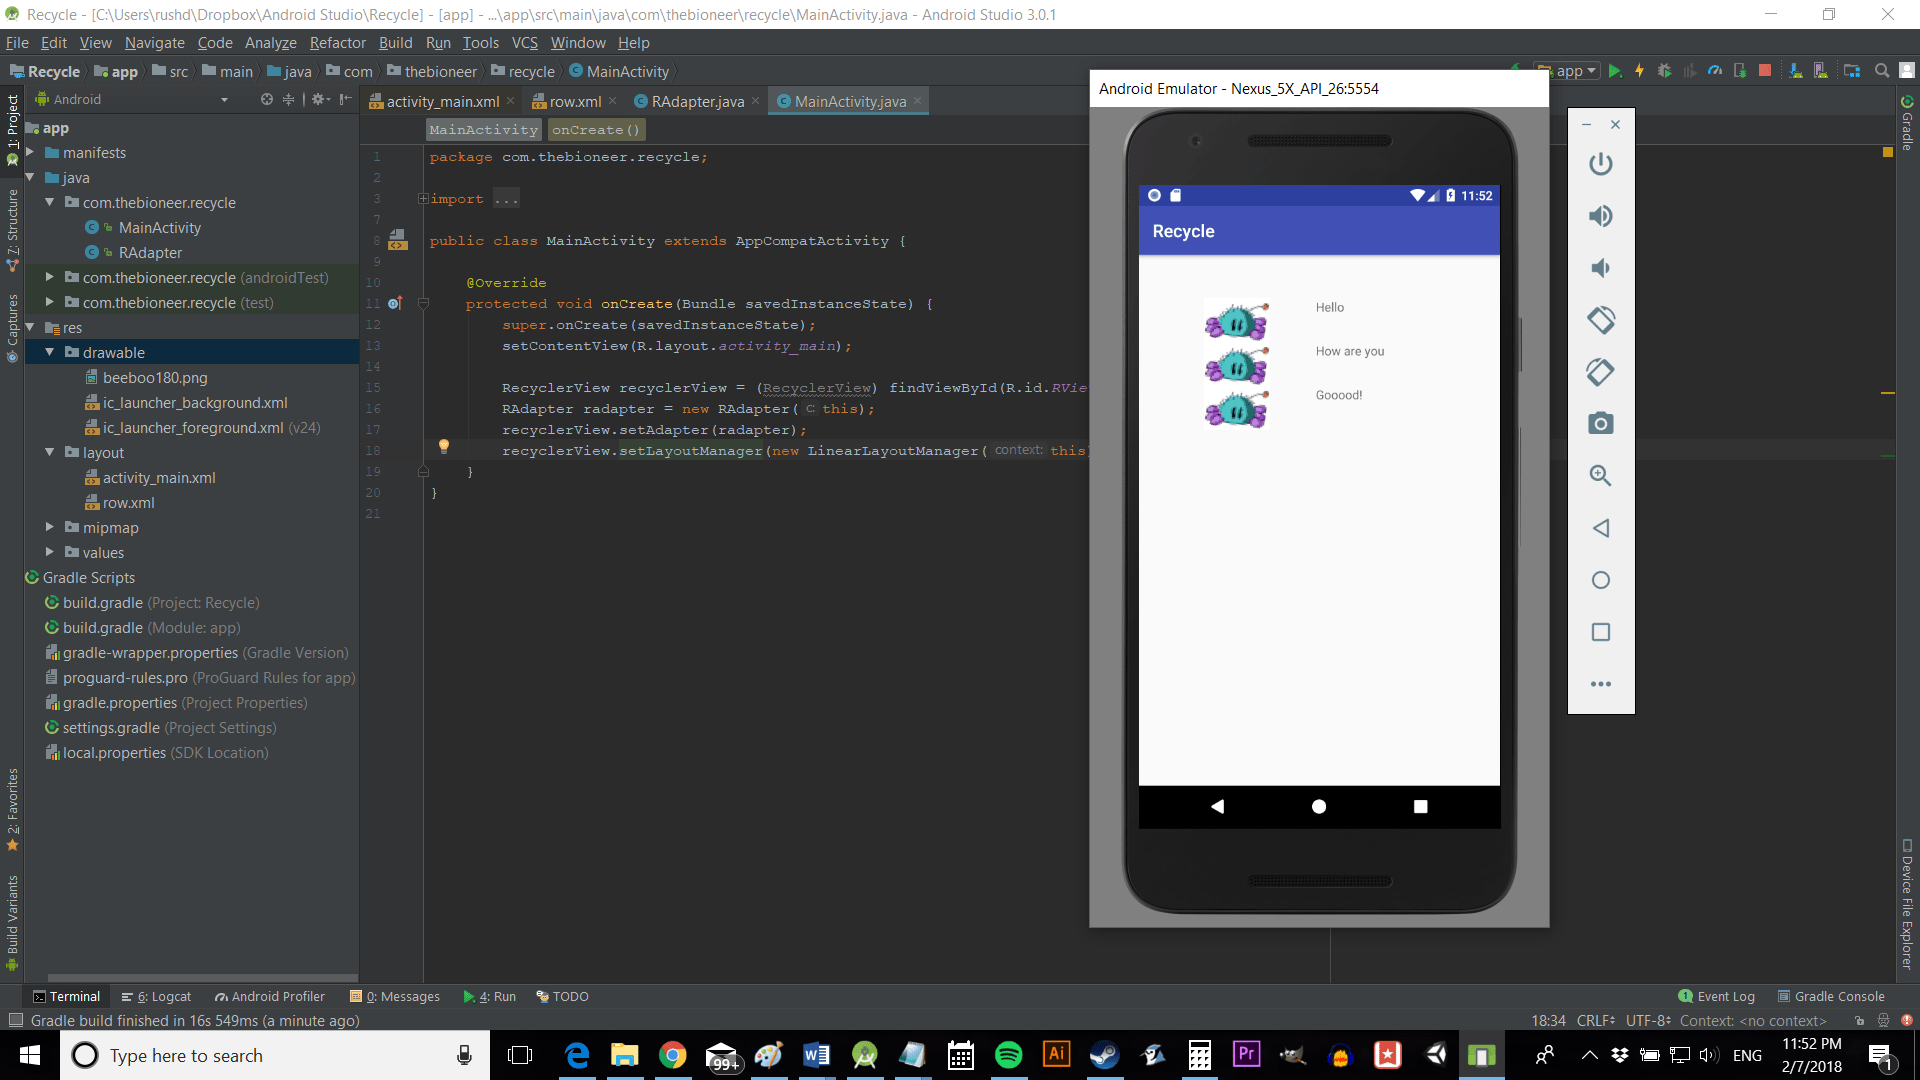
Finally, we need to jump back intoMainActivity.javato actually use these new classes.
All you’ll need is these few lines to use the adapter to add information to the view.
With that, you should be ready to hit play and test out your recycler view.
This would probably benefit from aligning to the left and a fair bit more polish. Play around in your XML to get things just how you want them.
Adding interaction
My aim here is to provide just enough code and information so you may reverse engineer this to get a recycler view working in your own app. You might also want to know how to handle click events so that your user can tap on a message for instance to respond to that contact.
Thankfully this is nice and simple: you just need to get yourViewHolderto extendOnClickListener. This means it is borrows a method from that class, without becoming a subclass itself.
Just update your view holder to look like this:
Now when someone clicks the item, it will show the message in a toast. you may replace this with whatever function would be useful for your app, like launching your message composing activity!
Closing comments
That should give you a basic skeleton and understanding of how to use recycler view. It’s a massive headache, but it’s also logical once you sit and really think about it. Recycler view is incredibly versatile and powerful once you have it working. It’s worth getting to know so you can make great-looking apps that are easy to navigate and interact with.
For another example of what can be done with recycler view, check outthis image gallery project.
Some other development content you might like:
Thank you for being part of our community. Read ourComment Policybefore posting.
